Elise - A Responsive Blogger Theme, Lets Take your blog to the next level using this Awesome Theme

This is an example of a Optin Form, you could edit this to put information about yourself or your site so readers know where you are coming from. Find out more...


Following are the some of the Advantages of Opt-in Form :-

  • Easy to Setup and use.
  • It Can Generate more email subscribers.
  • It’s beautiful on every screen size (try resizing your browser!)

Wednesday 1 April 2015

// // Leave a Comment

How to Block Sound through Registry in Windows XP and 7


Group Policies are used to apply system and security policies for the client PCs in a Windows Active Directory based Domains. While Group Policies is vast in itself to explain, here is a simple procedure on how to enable/disable a service or a Device driver using Group Policies.
The registry keys that the Group Policy targets to disable the service or the drivers is here
[HKEY_LOCAL_MACHINE\SYSTEM\CurrentControlSet\Services]

All the device drivers, services & applications can be found here. I’m disabling my Audio device driver for example in this case.
The Audio driver in my PC is aeaudio.sys and the registry key is
[HKEY_LOCAL_MACHINE\SYSTEM\CurrentControlSet\Services\aeaudio]

In the right-pane, there is a DWORD entry “Start”

The possible values are

“4″ – Disable
“3″ – Manual
“2″ – Automatic
“1″ – System
“0″ – boot

The value “4″ disables the driver. Set the value of the DWORD to “4″ to disable the driver.


Ok. Now, how we do it to multiple client PCs using Group Policies.
Create a new Administrative Template (say sound_dis.adm) with the following
; Replace aeaudio with actual driverkey or service in Registry
; Start = 4 (disable), 3 (manual), 2(automatic), 1 (system), 0 (boot)

Class Machine
CATEGORY “Hardware Control”
POLICY “Disable Soundcard”
KEYNAME “SYSTEM\CurrentControlSet\Services\aeaudio”
PART “HW: Analog Devices (Soundmax)” Checkbox
VALUENAME “Start”
VALUEON NUMERIC 4 VALUEOFF “3″
END PART
END POLICY
END CATEGORY

Once done, import the template in GP snap-in and apply to the group of PCs. The next GP update will disable the registry key on the PCs. Test to see there is no more sound from the system.

Read More
// // Leave a Comment

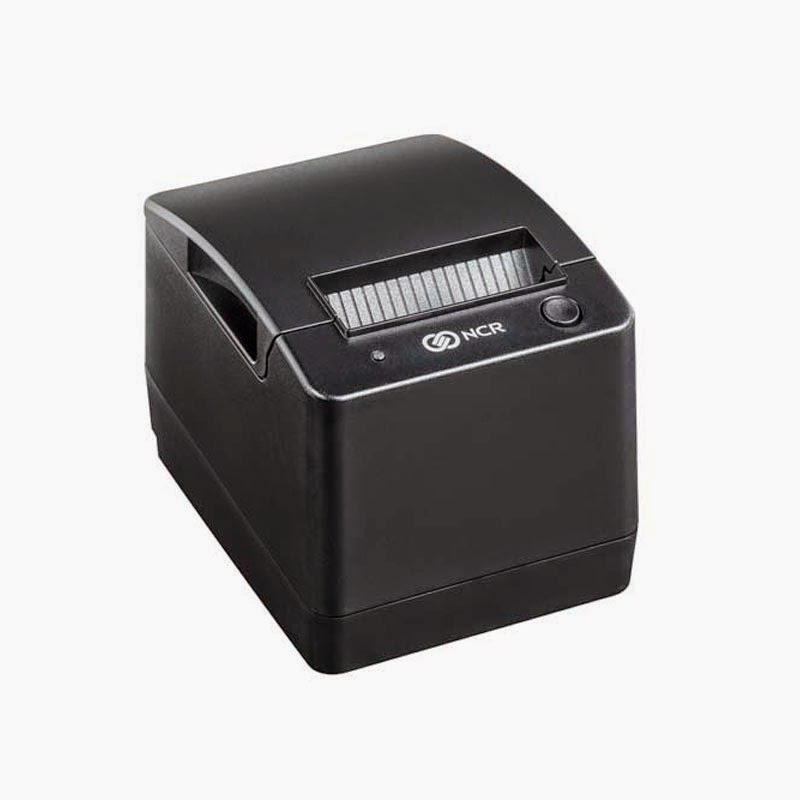
How to enable the Default Code "Arabic" in NCR 7197 Thermal Printer.

NCR thermal printer now available the Arabic printing facility, its good to the middle east customer and retail markets.

The latest firmware and how to change the default code page in NCR printer.   
NCR 7197-6001-9001
Instruction need to follow by the change default code page.

  • Open the printer flip cover and press the feed button.
  • Close the flip cover while holding the feed button, leave the feed button you will get the configuration page with complete information and support language.
  •  Now you need to enter the diagnostics mode, for that in back of printer you get (DIP switch) ON DIP switch (#1). 
  • Now remove the power from printer and wait 2-5 second. 
  • Hold the feed button and plug in the power. 
  • Now you will in diagnostics mode, and change the configuration as you want. 


  • Now if you want to change the "Default Code" click the 7 time to feed button and to confirm the selection hold it at least 1 second.

Read More

Thursday 5 January 2012

// // Leave a Comment

Unable to Access USB Ports

Drivers


Special software programs, known as drivers, are typically needed for a computer to interact with devices that access its USB ports. When these drivers are not installed or have been deleted, the computer will appear as if it is unable to access its USB ports. This is indicated by the computer reporting that a connected device is not present when it actually is or that the port cannot be found. Run a system wide search for the driver’s name to see if it is present on the computer. If not, reinstall the driver from the connected device’s installation disc, which typically comes with the device. If you no longer have access to the disc, check the device manufacturer’s website to see if it is available for download.


Glitches


Occasionally, computer glitches cause a computer to fail in its attempts to access its USB ports and any devices that are connected via a USB cable. These glitches can be caused by malfunctioning or damaged wiring inside the computer. Often, you can fix these types of problems by restarting or turning the computer off and back on again, a process that resets the drivers and wiring that connect the USB ports to the computer.


Identification Issues


Sometimes, a computer fails to recognize or identify one of its USB ports or drives due to a misidentification that is easily fixed. From the computer’s “Control Panel” option on the “Start” menu, choose the “Administrative Tools” icon, then open “Computer Management.” From this menu, select “Disk Management,” then right-click on the USB port item, which might be designated as a removable disk or simply appear blank. Right-click on this list item and type in a letter designation that has not been used by the computer’s other disks, such as M or N. This should help your computer identify and access its USB port.


Damaged Cable


A damaged USB cable or connector can also cause a computer to lose access to its USB ports when a peripheral device attempts to connect to the computer. You can identify USB cable damage by inspecting the areas where the wire and connector meet. Cable damage is often caused by removing the connectors by tugging on the cable instead of firmly grasping it by the connector. If a damaged USB cable is the cause of your computer’s inability to access its USB port, you should replace the cable.
Read More
// // Leave a Comment

Computer Comes On and the Screen Goes Blank and Sound Cuts Out

                                     
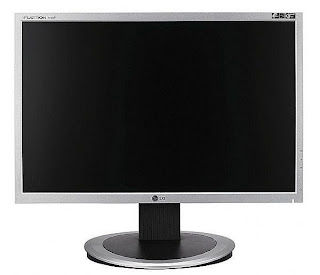
A computer screen that turns on momentarily or doesn't turn on at all, combined with audio problems could be merely a coincidence caused by various problems in multiple systems occurring simultaneously, or it could signal that your entire computer system is in jeopardy. Troubleshooting these issues begins by determining whether the audio and video problems are independent of one another

Screen Issues

Your LCD computer monitor relies on a backlight to illuminate the colors and images generated on its screen. Light-emitting diodes, or LEDs, and cold-cathode fluorescent lamps, or CCFLs, are the two main types of backlight technology used for LCDs. These backlights have a life expectancy of 20,000 to 50,000 viewing hours, depending on which technology your computer uses. A key sign of backlight failure is a screen that turns on -- but just for a few seconds -- before flashing to black; a dim screen or a flickering screen are failing backlight symptoms as well. Having your screen's backlight replaced should alleviate the flashing issue.
 
Sound and Video Card

Audio that cuts in and out on a computer can be a sign of sound card failure; likewise, flickering or flashing video on a screen is a sign of video card failure. Laptops use these cards to help generate the pictures and sounds you see and hear on screen; these cards require periodic software updates, which come from your manufacturer's website. Check your computer's settings menu to make sure these cards are installed properly. Next, visit your manufacturer's support website to determine whether the company has released any software updates specifically for your computer. Download and install any updates, restarting your computer to complete the process. The sound and video cards aren't linked in any way; just because one requires an update does not mean the other does as well.

Cable Connections

Unless you're using a laptop on the go, your computer requires multiple cable connections to operate correctly. Desktop computers use power cords, as do laptops while they're charging. Desktops also use cables to connect the CPU to the monitor, and both types of computers use cables to connect to exterior speakers. A short in any of these cables can cause issues, as can improper connections or damaged plugs. A frayed, crimped or otherwise damaged power cord, or a cord that isn't plugged in correctly, can cause interruptions to both your video and sound on the screen.

Technical Failure

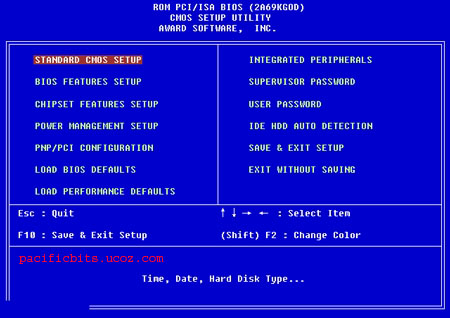
The failure of several key components within your computer can lead to interruptions with your picture and sound. One of these components is your computer's power supply unit, or PSU, which delivers a constant stream of electricity to your computer. A faulty PSU cannot protect against dips and surges, leaving your computer vulnerable to power outages and fried circuits. Your computer's BIOS is built into the motherboard; BIOS software is responsible for all your computer's basic functions -- such as booting up -- and requires periodic updates, which can be obtained from your computer's manufacturer. Additionally, your computer's CMOS battery is responsible for storing its BIOS settings -- meaning that a dying CMOS battery can corrupt the integrity of your BIOS settings as well.
Read More
// // Leave a Comment

Color Codes for a 3-Wire Computer Fan

Computer fans need to be connected to the power supply in order to function, typically via the motherboard. Many basic fans have only two wires -- one for the ground or zero-volt connection and one for the positive connection. Your fan may also have a third wire, which carries a signal that tells the computer if your fan is working properly. The colors of the wires may vary


Computer Fans

Your computer may contain several different fans. The main central processing unit fan is very important, as the CPU gets very hot during normal operation and can be damaged by excess heat. The CPU moves air across the processor's heat sink to keep it cool. The case fan is usually located at the back, or sometimes in the side of your computer's case. Its job is to expel hot air from inside the computer while drawing in cool air. The computer's power supply can generate a lot of heat, and some power supplies come with a fan to vent this heat outside the computer case. High-end graphics cards may also use fans to keep them cool. You can add extra fans to your computer to improve air circulation.

Color Codes

Typically, the zero volt or ground wire is black, the +12-volt or +5-volt wire is red and the sensor wire -- also known as the tachometric, signal or revolution wire -- is yellow. In some cases, both the +12- or +5-volt wire and the signal wires are yellow. The signal wire may also be white, especially in fans made for Dell computers. Other colors are possible, but less common.

Pinouts

The color codes of the fan's wires help you to connect it correctly, but they're not your only guide. Most conventional connectors are keyed -- specially shaped so that they can only be connected in the right orientation. If you are connecting a three-wire fan to a four-pin connection, however, you will need to ensure that you use the correct three pins. The connector on the motherboard will often have the correct connections printed next to it. The ground wire is usually connected to pin one, the +12- or +5-volt wire to pin two, and the sensor wire to pin three.

Different Connectors

Some computer manufacturers -- Dell in particular -- use proprietary motherboard connectors that are not compatible with generic fan connectors, although the wires are often arranged in the same way. You can find adapters that let you plug an aftermarket fan into a proprietary connector.


Read More
// // Leave a Comment

How to Fix Vertical Lines on the Computer Screen


Unusual black lines on your computer monitor indicate a problem in one of three components; the monitor itself, the graphics card or the motherboard. A second monitor can help you narrow down the true source. If the vertical line also appears on the second monitor, the problem lies within the circuitry of your computer. A clean image on the second monitor indicates the display problems seen on your original monitor are due to a fault within that monitor itself.

Check Connections 
Computer monitor problems are sometimes caused by a simple loose or failing video cable. For desktop systems, check that the cable is connected securely and properly from the back of the monitor to the back of the computer, and that the graphics card is secure inside the tower. Check for signs of fraying or damage on the cable, and replace if you find any splits, exposed wiring or severe kinks that may interfere with proper communication between the monitor and computer. Laptop computers require disassemble to access the video cable, so consult your user or service guide for assistance.

LCD Failure 
LCD monitors can experience failure from external damage such as moisture collection and rough handling, or from internal problems such as burned out circuitry due to a power surge. Video problems such as lines, strange color changes and scrambled images are common symptoms of LCD failure. Depending on your computer, an experienced computer repair technician may be able to repair the problem, or you can simply replace the monitor or LCD screen.

Graphics Card Problems
The component responsible for translating the data and information from your computer into visual images is the graphics card, also known as a graphics chip in laptops. If this component fails, the images that appear on the screen can contain vertical or horizontal lines. Connecting a second monitor will show these lines as well. Desktop computers allow you the ease of simply replacing the graphics card, while laptops typically require the replacement of the entire motherboard due to their compact and space efficient nature.

System Board Problems 
The system board, or motherboard, is the nerve center of the computer, and controls all the various actions and processes your computer needs to operate. In some cases of vertical lines, the monitor and graphics card are both fine, but the motherboard itself is not communicating with either properly. Unfortunately, diagnosing a faulty motherboard is not easy, and usually only occurs when all other possible causes are eliminated.
Read More

Tuesday 27 December 2011

// // Leave a Comment

Fix Boot Up Problems by Resetting BIOS

Ever had a problem were your computer can’t boot up or you played with some setting and your computer stopped working properly afterwards. The problem could be with your BIOS. When there is a problem with your BIOS you won’t be able to boot up your computer properly. You might be able to fix it by resetting your bios.

There are a couple ways to clear the BIOS or CMOS as it may be labeled on your motherboard. There are two ways to reset your BIOS even if you are not visually accessible to it.
The first step is finding your power box in the back of your desktop. (In most cases it is on top of the desktop). When you found the power box you should notice a removable power cord connecting to your power box. Pull the removable cable out of your power box.
The second step to resetting your BIOS is unscrewing all of the screws on your desktop required to open it. (In most cases the screw heads on the desktop are Phillip’s)
Then open your desktop by taking of the lid in order to access your mother board with the jumper on it. The jumper is a two pin connector located on a 3 pin stand. After doing so locate the flat battery which is placed on your motherboard. In most cases the battery is a round component with a silver coating.
Next to the battery should be a jumper like the one shown above. Now be careful because most motherboards have two or more of these jumpers. Make sure your Jumper says BIOS or CMOS on the base. If it doesn’t try finding a different jumper. When you do find the right jumper pull the two pin connector and put it on the opposite side, the clear CMOS/BIOS side. Then press the power button on your computer with the power cord unplugged.


When you have completed the last steep put the cases lid back on. After you done so screw all the screws back where they belong and plug the power cord back in the power box. Try starting your computer. When your computer boots it should notify you the BIOS is cleared. Some computers require you to restart your computer after that message. If the computer prompts you to do so then follow it’s command (press F# or press the power button again).
Another way to reset your BIOS is by removing your battery. You can do this by doing step one and two as I mentioned above. After you finish open your desktop case (if necessary to access the motherboard) and then remove the battery I described above. Wait 30 minutes before putting it back in. When you did plug the power back in, screw the cover back on, and turn your computer on.
Read More